

-
How to Install AAC Wall Panels Correctly?
-

Importance of Correct AAC Wall Panel Installation
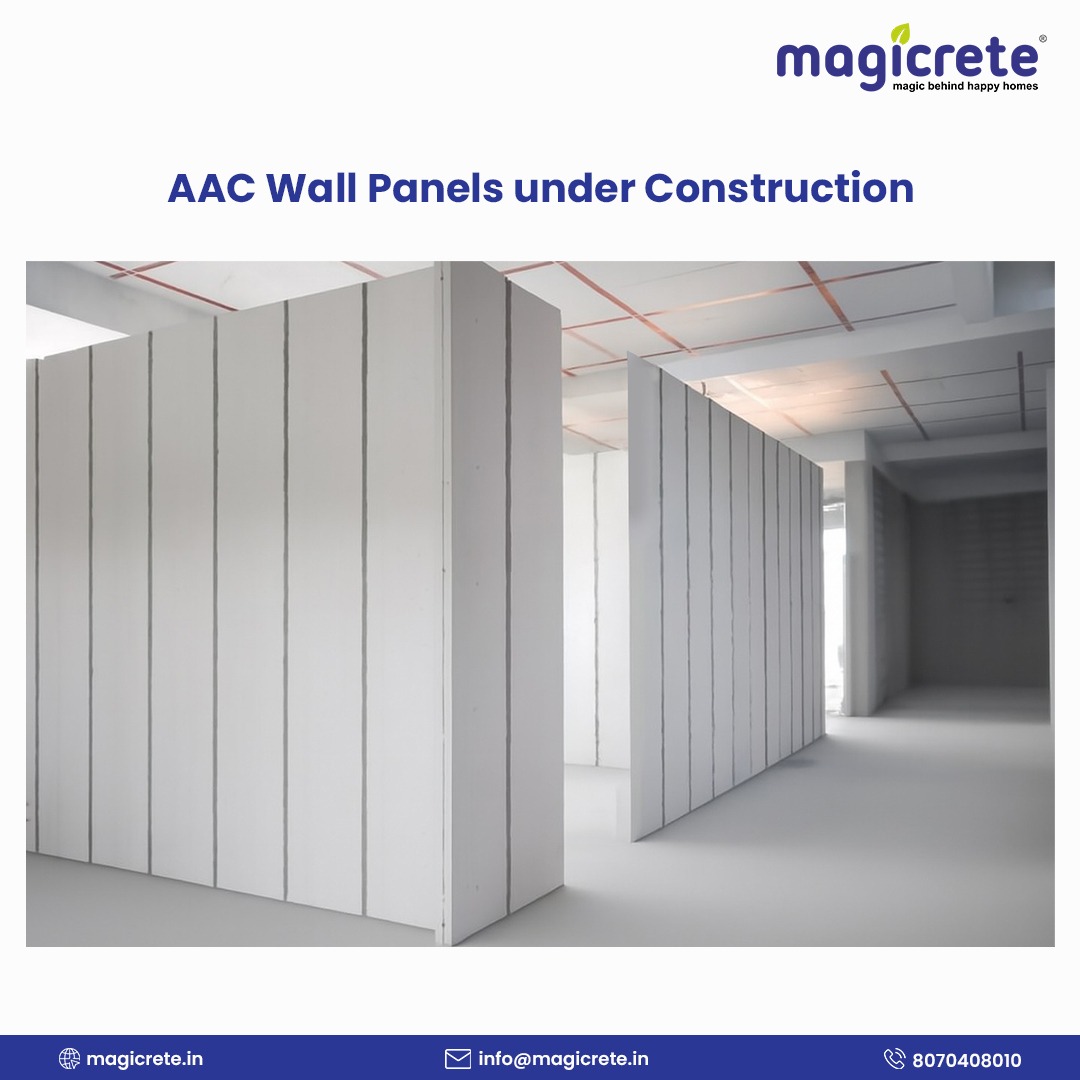
Autoclaved Aerated Concrete (AAC) wall panels are quickly becoming the preferred choice in both commercial and residential construction. They deliver faster build times, higher strength, and reduced labor needs compared to traditional brickwork. However, even the best AAC panel fails if not installed right. Incorrect installation can lead to cracks, poor alignment, and expensive rework. That’s why understanding the proper method is critical for durability and performance. If you're working with a new contractor or team, share this guide with them to ensure every project benefits from AAC wall panels’ full potential.
Pre-Installation Preparation: Site and AAC Panel Readiness
Site Preparation Before AAC Panel Installation
Before beginning, ensure the RCC frame is plumb and vertical. The base surface must be leveled, with lintels placed properly. Services such as conduits and electrical routing should be accounted for to avoid later cutting into panels. This careful groundwork is the foundation of a strong, crack-free wall.
Unloading and Storage of AAC Panels
AAC panels must be handled with nylon slings or padded trolleys to prevent chipping. Always stack panels on a flat surface with support battens beneath them. Poor stacking often damages panel edges, which compromises their fit and finish.
To see dimensions, technical specifications, and purchase options, explore more about Magicrete AAC Wall Panels.
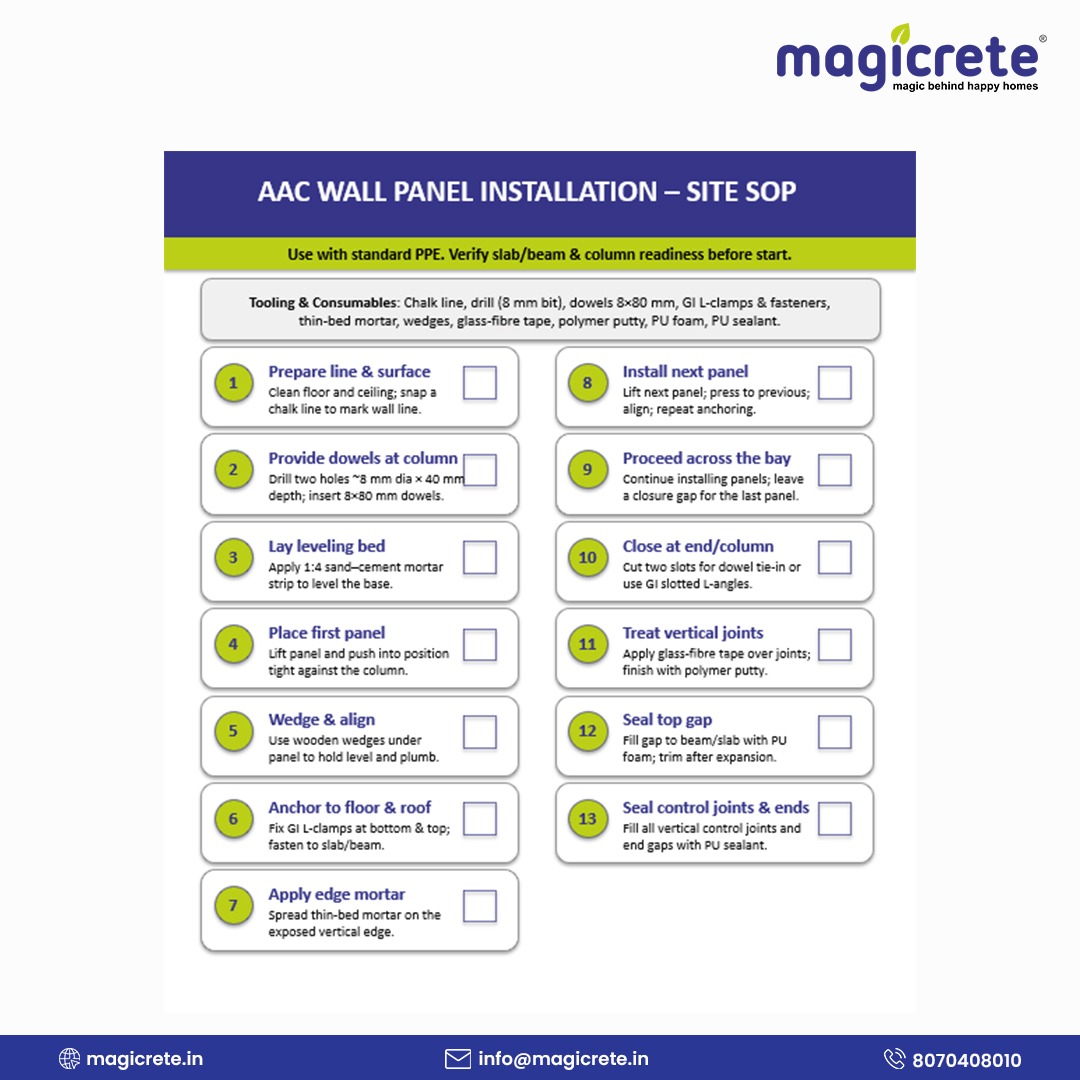
Step-by-Step AAC Wall Panel Installation Process
Installing AAC wall panels is quicker and cleaner compared to brickwork. Here’s the standard AAC wall cladding installation guide:
Step 1: Clean the Surface
- Ensure the floor and ceiling are free of dust before making the line by chalk.
Step 2: Drill Holes
- Drill 2 holes of 40 mm depth and 8 mm diameter at the column where the panels will be anchored.
- Insert dowel bars (8 mm dia × 80 mm width) into the holes for secure anchorage.
Step 3: Apply Sand-Cement Mortar
- Apply 1:4 sand-cement mortar on the floor to level the surface before installing the panel.
Step 4: Lift and Position the Panel
- Use cranes or trolleys to lift the panel into position and push it to attach to the column.
Step 5: Attach the Panel
- Insert wooden wedges under the panel, ensuring it is firmly in place, and then attach the panel to the column using GI clamps.
Step 6: Apply Thin-Bed Mortar
- Apply Magicrete JointPRO on the side of the first panel if required, similar to the application standards discussed in AAC block jointing mortar: better than traditional cement?
Step 7: Install the Next Panel
- Lift the next panel into place, align it with the previous panel, and repeat Steps 5–6 to attach and seal.
Step 8: Install Additional Panels
- Continue to install the panels in sequence, ensuring each panel fits securely.
Step 9: Carve Dowel Slots
- Carve 2 slots in the panel for dowel connection between the panels and the column or use GI slotted L angles for additional support.
Step 10: Apply Joint Tape
- Apply glass fiber tape on the joints between the panels and cover with polymer-based putty.
Step 11: Seal the Gaps
- Fill the gap between the beam/slab top and wall panel using PU foam, removing any excess.
Step 12: Seal Vertical Joints
- Fill PU sealant in vertical control joints and end gaps to prevent water ingress and ensure a tight seal.
Installation Tip: Always allow for movement joints every 5m — this is critical in high-rise builds, especially when comparing structural behavior in AAC wall panels vs sandwich panels: a detailed comparison.
Common Mistakes to Avoid During AAC Wall Panel Installation
Inadequate Surface Preparation
- Mistake: Not cleaning the floor and ceiling before installation.
- Consequence: Dust or debris can affect the bonding of the mortar and prevent the panel from adhering properly.
- Solution: Always ensure surfaces are free of dust and debris to create a clean, smooth base for mortar application.
Incorrect Panel Alignment
- Mistake: Not properly aligning the panels with each other or with the column during installation.
- Consequence: This leads to uneven wall surfaces, gaps between panels, and structural instability.
- Solution: Use spirit levels and plumb lines to ensure the panels are properly aligned before securing them in place.
Improper Mortar Application
- Mistake: Applying an incorrect thickness or mix of mortar.
- Consequence: Insufficient mortar can weaken the bond, while excess mortar can result in uneven surfaces and poor fit.
- Solution: Follow the recommended 1:4 sand-cement mortar ratio and apply thin-bed mortar uniformly for proper adhesion.
Skipping Anchor Installation
- Mistake: Failing to install anchors and dowels as required by design.
- Consequence: Panels may not be securely fixed, leading to potential shifting, cracking, or detachment, especially under load or seismic conditions.
- Solution: Always drill proper holes for dowels and anchors, ensuring the correct dowel bar dimensions (e.g., 8 mm dia × 80 mm width) for maximum load-bearing capacity.
Failure to Use Proper Fasteners
- Mistake: Using incorrect or substandard fasteners.
- Consequence: Weak fasteners can cause panel detachment or improper alignment, particularly under wind or seismic load conditions.
- Solution: Use fasteners and clamps that comply with IS code guidelines for structural performance in high-wind or tall building applications. Refer to IS 1893 and IS 1905 for proper specifications.
Neglecting Joint Sealing
- Mistake: Not sealing the joints between panels correctly.
- Consequence: Unsealed joints allow moisture ingress, compromising the structural integrity and leading to possible damage.
- Solution: Apply glass fiber tape with polymer-based putty at all joints and fill vertical joints with PU sealant to ensure water-tightness.
Improper Use of PU Foam
- Mistake: Using too much or too little PU foam to fill gaps between the top of the wall panel and beam/slab.
- Consequence: Excess foam can create instability, while insufficient foam may lead to gaps and incomplete sealing.
- Solution: Use just enough PU foam to fill the gaps, removing any excess to maintain structural integrity and finish.
Overloading Panels During Installation
- Mistake: Attempting to lift or move panels that exceed the weight capacity of available lifting equipment.
- Consequence: This can lead to panel cracking, injury, or damage to the structure.
- Solution: Use cranes or trolleys rated for the specific weight of the panels and follow the manufacturer's handling guidelines.
Ignoring Proper Reinforcement for High-Wind Zones
- Mistake: Failing to account for the required reinforcement or anchorage in high-wind or seismic zones.
- Consequence: The panels may fail under strong winds or seismic forces.
- Solution: Conduct anchor pull-out tests and follow IS 1893 (Part 1): 2016 and IS 1905:1987 for appropriate reinforcement and anchoring in such zones.
Rushing the Curing Process
- Mistake: Not allowing sufficient curing time for mortar or sealants.
- Consequence: Insufficient curing can affect the bonding strength and lead to cracking or poor panel performance.
- Solution: Allow proper curing.
Post-Installation Finishing: From Cladding to Paint
For Internal Walls:
- No plastering required: AAC panels for internal walls do not require traditional plastering. Instead, a 6mm gypsum punning or a combination of coarse and fine putty coats will suffice for surface smoothing.
- Joint Treatment: Ensure Magicrete JointPRO is used for filling the joints between panels to create a seamless, smooth surface.
- Glass Fiber Tape & Polymer Putty: Glass fiber tape should be applied on the joints between panels and covered with polymer-based putty to reinforce the joints and create a smooth finish.
- Surface Preparation: After the joint treatment and surface preparation, internal walls can be finished with paint or tiles directly. For tiling, Magicrete Tile Adhesive is recommended.
- Sealing Vertical Joints: Use PU sealant in vertical control joints and end gaps to prevent water ingress and ensure a tight seal.
For External Walls:
- Plastering or Render is Mandatory: External AAC walls need plastering or an external wall render to protect against moisture and weather exposure. This treatment ensures the wall surface is resistant to environmental factors.
- Joint Treatment: Just like for internal walls, apply Magicrete JointPRO to fill the joints between the panels and glass fiber tape over the joints. Cover the tape with polymer-based putty for a smooth, seamless finish.
- Glass Fiber Tape & Polymer Putty: Glass fiber tape is applied on the joints, followed by polymer-based putty to reinforce the panel joints and improve the durability of the surface.
- Sealing Gaps: Fill the gap between the beam/slab top and wall panel using PU foam, removing any excess.
- Sealing Vertical Joints: Use PU sealant in vertical control joints and end gaps to prevent moisture from seeping in and ensure a tight seal.
- Recommended Finish: After joint treatment, apply cement-based render or elastomeric paints for weatherproofing, as well as to improve the visual appeal and protect the surface.
Build Faster, Smarter & Safer with AAC Wall Panels
Correct AAC wall panel installation unlocks the real advantages of this system—faster construction, precise alignment, thermal insulation, and long-term durability, all of which are explained in detail in our thermal insulation benefits of AAC blocks in Indian climates guide. Poor practices are the number one reason builders don’t see the expected results. For trusted guidance and comprehensive solutions, partner with Magicrete. Get the method right, and AAC panels can truly transform your project efficiency.
FAQs
Q.1: What is the best adhesive for AAC wall panel installation?
A: Magicrete Panel Adhesive, designed for strong bonding and faster setting.
Q.2: Can AAC wall panels be installed without fasteners?
A: No. Mechanical anchors are essential for stability, especially in seismic regions.
Q.3: How long does AAC panel installation take for a 1000 sq. ft. wall?
A: Typically 40–60% faster than red brick, depending on crew size and site readiness.
Q.4: What is the curing time after panel installation?
A: AAC requires minimal water curing, usually just surface-level.
One-Stop Solution for all your Construction Needs
Contact Us